Overview
For pixel art to look good, especially in motion, it is important to make sure that all pixels fall on a proper sprite boundary. For our game if its rendered with a 2 pixel by 2 pixel boundary, this means a pixel in our game needs to take up the space on (0,0) (0,2) (2,0) (2,2). If for whatever reason a pixel falls on (1,0) (1,2) (3,0) (3,2) it will create unintended graphical errors when compared to all of the other sprites. Even worse is when assets fall on a sub-pixel like (1.5, 2) This means that depending on where the camera is in the world the pixel will either render or not render giving a weird “jumpy” effect to the character’s size.
In the above image, the Main Character is not being properly rendered on the correct sprite boundary. Outlined in red you can see that the tiling on the floor does not properly fall on the 2x2 pixel boundary. Comparatively, the truck on the left-hand side outlined in grey is properly rendered and lines up perfectly both horizontally and vertically with the tile.
AutoSnap
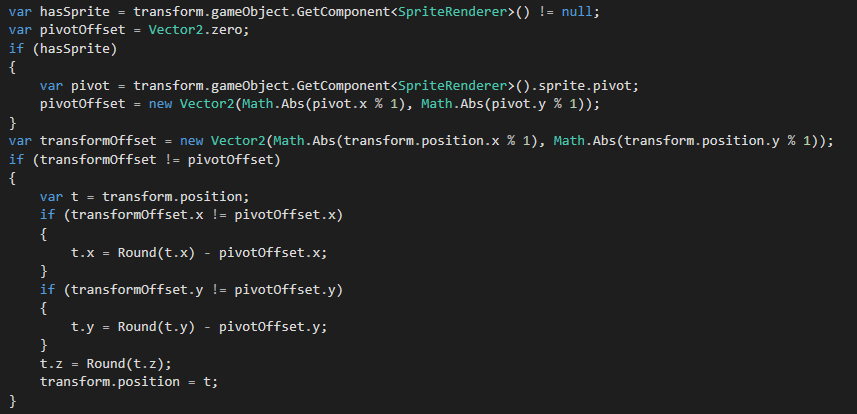
Up until now, our camera and the sprites themselves did not attempt to conform to the sprite boundary, so when we setup our scenes sometimes sprites would be on positions that would render them improperly. We solved this by adding a new window to the Editor that will automatically snap everything into its proper position based off of its sprite size.
Our version of the code is roughly based off of the implementation here with a few additions:
AutoSnap Github Code Reference
The two major differences between the two codebases is that ours takes into account the Sprite’s pivot in determining the offset and that instead of using a previousPosition to determine if we should update the position we use the difference between the transform and the sprite’s pivot.
We decided to go this route as it solved the hardest problem we had with our asset production pipeline.

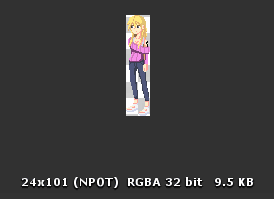
In Unity there are a variety of predefined pivot points as well as the option to define your own on a sprite. This pivot point determines the point on the sprite used as the position in the editor. Unfortunately, we used the default center pivot option. Which while not a problem normally, becomes an issue due to the fact that our assets do not have standardized sizes. So when an asset like the one pictured above has dimensions of 24x101 it creates a center pivot on 12x50.5, a subpixel. Meaning that if this sprite is rendered on (0,0) it will not be pixel perfect, and will need to be rendered in the world at heights ending in .5 to do so.
Orthographic Cameras
Ensuring that the sprites themselves are rendered on a proper boundary, while necessary, isn’t the only enhancement that needs to be made to ensure sprites are rendered correctly. The camera itself is the other major factor in making sure everything is rendered consistently.
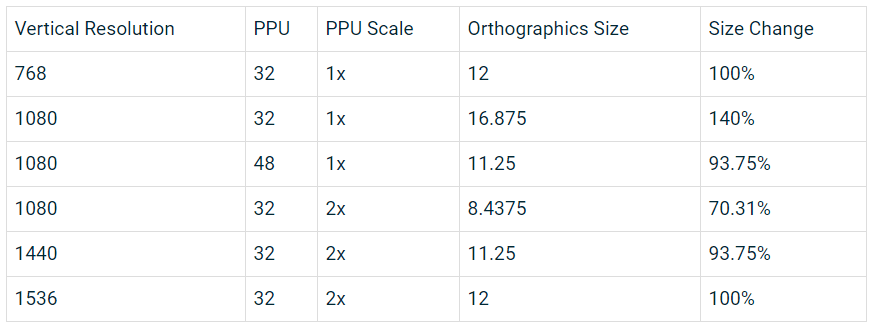
Because our game uses an orthographic camera, there are a few general rules in its setup. Normally you’d change the pixels per unit and the orthographic size together in order to create the best scale for your game. Due to our previous projects, we opted to experiment with a PPU of 1 (for better or for worse). Up until now we kept the Orthographic Size of the camera at a constant at all resolutions which led to the game looking better or worse depending on the device used. To combat that we introduced a dynamic orthographic size.
Using the following table from Pixel Perfect 2D Unity Blog

Our code for setting the orthographic size of our camera simplifies down into:
This will give us a constant orthographic size to use at each resolution we support and as such looks consistent between different computers and screen sizes.

